Hi All,
Welcome back. Today I am going to focus your attention on bundles. Well, the bundle is the most famous term you will frequently hear, during your adventure in Symfony 2. Actually, the bundle is a really handy feature which has been introduced by any PHP framework (not quite sure about rest of the frameworks) so far. Well, a Bundle is a package, collection of views, entities, controllers and so on. You can organize your code around bundles in a very smart way. And if you use bundles smartly, you can develop a system with highly independent features. Why not we discuss some examples before creating bundles,
- Example 1 : Assume you are creating a basic employee management system. The basic features in a employee management system are employee registration, employee profile, employee payroll, employee attendance and so on. For employee registration, we have a separate UI with relevant registration form fields, we have separate functions (let’s call them controllers), such as checking existence of the employee, validity of the user input values, validity of employee national insurance number (in UK), and so on. And also, we got separate tables to insert values once the user submitted his/her employee registration form. Likewise we can group things (mainly model, view and controllers) in a functional way (but, it’s totally up to you). We call these grouped things as ‘bundles‘ in Symfony 2.
- Example 2: Let’s say you are creating a shopping cart system. In a shopping cart system, we know there are products, categories, sub categories, payment methods and so on. In here, we can have a separate bundles for products, categories and so on. For an example, inside categories bundle, we can nicely arrange things which are mostly relevant to managing categories. These things can be views (html and associated js, css files and so on), models (tables, schema and so on) and controllers (functions such as adding a category, deleting category and so on). So, in here, we are arranging bundles in a logical way. Likewise, you can organize your bundles for products, sub categories and so on.
You have seen in above two examples, that we can arrange bundles in our own ways. The first approach is much towards functional level and the second one is much towards the logical behaviour of the system. Two approaches I have discussed above may not going to work for your business case. The good thing in Symfony 2 is, it allows a great level of freedom to organize bundles according to your taste. So, organising bundles is totally up to you and you can use your own approaches to arrange your bundles. The bottom line :- ‘A bundle is an independent package (you can make it independent if you are smart) that holds things like models, views and controllers together‘.
I hope you had a good understanding about bundles. Now let’s create our first bundle. In Symfony 2, bundles are residing under ‘src’ folder. If you have a working copy of Symfony 2 (I have discussed setting up Symfony 2 in XAMPP in my previous post) you can see the ‘src’ folder as below,
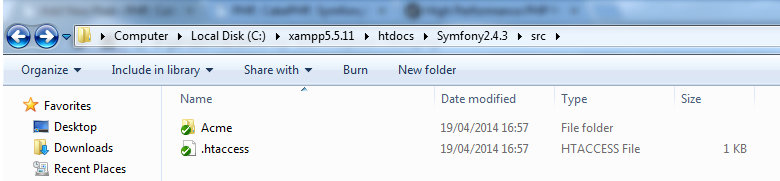
As you see there is currently one folder called ‘Acme’ which was created as sample when you installed Symfony 2 in the very beginning. ‘Acme’ is the package name and the bundles for this package resides in it. We are leaving the ‘Acme’ package as it is for now and let’s focus on creating our own, first, brand new bundle. Remember, under ‘src’ you can have packages (folders) and bundles lives inside that. The good thing is Symfony 2 comes with a handy command line console, so you can use it for bundle generation and for many more things (let’s discuss in future).
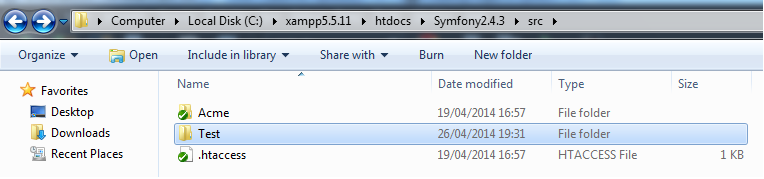
- Create a folder called ‘Test’ under ‘src’. So, you will be having an empty folder called ‘Test’ in ‘src’, see below,
- To run ‘php’ command prompts, first you have to set your ‘path’ under system environmental variable. (I am not going to discuss too much on this, it’s very simple, take a look at the image below, check here for more :- http://geekswithblogs.net/renso/archive/2009/10/21/how-to-set-the-windows-path-in-windows-7.aspx )
 Now, open up your command prompt and locate your Symfony 2 folder. (It’s C:\xampp5.5.11\htdocs\Symfony2.4.3 for me).
- Run this command, ‘php app/console generate:bundle – -namespace=Test/HelloBundle – -format=yml‘. In here, ‘ – -namespace’ is the location of the bundle that you are going to create including the name. ‘Test‘ is the name of the folder, you just created a minute ago and ‘HelloBundle‘ is the name of your bundle. ‘ – -format=yml’ is the doctrine orm mapping language that we are going to use, will be discussed later.
- Then you will see the following screen,
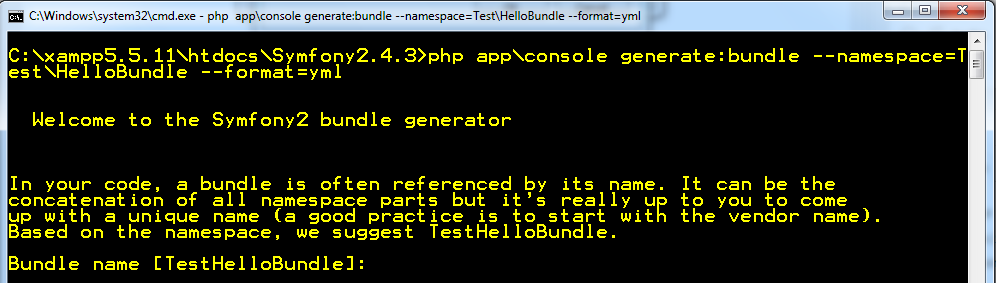
- In the above screen, it asks for the name of the Bundle. As you can notice in the word ‘TestHelloBundle’, ‘Test’ is the folder name and ‘HelloBundle’ is the actual name of your bundle. Hit enter without typing anything (unless you need to change the name), see below for the next screen,

- In the above screen, it says bundle can be generated anywhere but they have come up with the default path, which is under ‘src’ location, the perfect place to create your bundle, just hit enter without typing anything. Then look at the next screen,
- In the above screen, it asks whether it needs to generate whole directory structure, just hit enter without typing anything (default is no), because it will create whole set of directories, which we are not going to focus now. See the next screen

- As of the last screen you will be given the summary before it actually creates the bundle for you. Hit enter without typing anything until you see the last line which says now you can start using your generated code. In here, it asks whether you need to update the Kernel and Routing regarding this newly created bundle, say yes for both (default), because this is how you tell Symfony 2 that you are going to create a bundle.
- Hurray! You have just created a new bundle called ‘HelloBundle’ under ‘src/Test’ using Symfony 2 command lines. Well done. If you go inside ‘src/Test/’ you will now see a folder called ‘HelloBundle’, which has been created for you. If you go inside the bundle, you will see set of folders including ‘Controller’, ‘DependencyInjection’ and so on, we will be discovering these things in my next post.
Well, this is pretty much it for today. We have successfully created a new bundle today and I will be explaining more about these bundles (folder structure) in my upcoming posts.
Stay tuned.! Please leave your feedback for me. Cheers!

2 thoughts on “Create your first bundle | Symfony 2 | Beginners Guide”